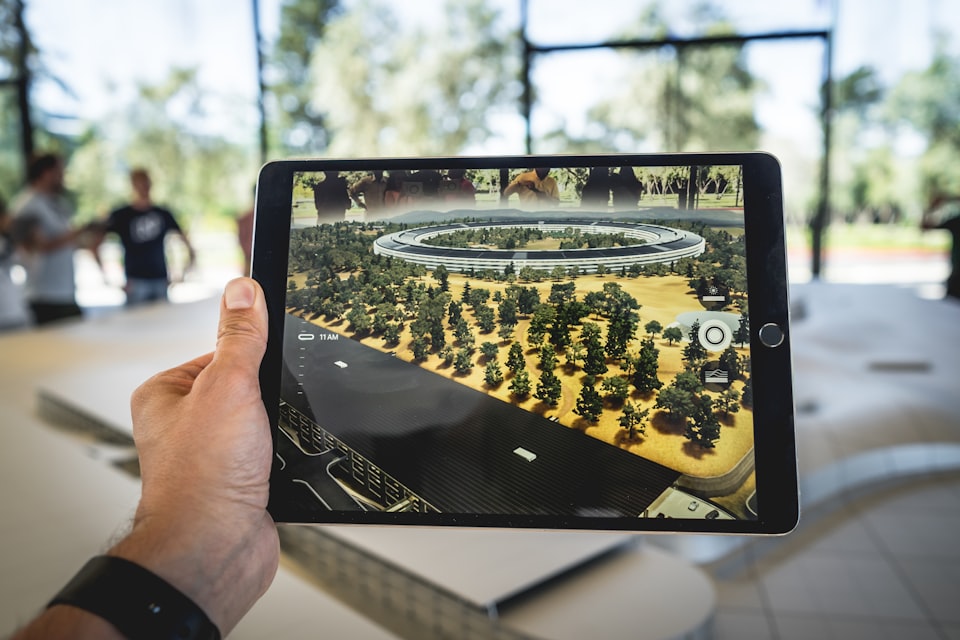
DevLog: How I created my first AR NodeJS-backed web service
A few years ago, a client of mine had an idea about an application that would leverage augmented reality features to play videos on top of images that would be featured into pages of his Greek news magazine.
Back then, NodeJS was in the mid 10.x (around 2014). There was no ARKit / ARCore. Augmented reality was something new to the world — both in terms of apps and frameworks one could use.
In this post, I will revisit the development of one of the most exciting projects I have had the opportunity to develop — in an era where the AR ecosystem was comprised of only a handful of posts and resources.
Conceptualizing
We sat together one afternoon and written down our ideas on what would later become a full-featured web and mobile application.
- The application would play videos on top of pages of my client’s magazine, using the camera of the mobile device.
- The videos that would be played should be uploaded into a web server.
- We should be able to provide a solution that would allow my client to associate images which the app would recognize and would play the uploaded videos on top of them (render-to-texture)
- My client also had some partners (around 700), that sold tires and made repairs to vehicles. He wanted to promote his partners, as well.
After carefully examining the requirements, we ended up deciding our approach:
- Our solution should be native iOS and Android because it would incorporate Augmented Reality features. In applications such as this, flexibility in terms of performance and features would be the key.
A backend server would be created to provide the following capabilities:
- Uploading videos with tags
- Uploading images for the mobile app to recognize in the magazine’s pages
- Handling the data entry for my customer to advertise his partners. The user should be able to enter the location of his partner (using google maps), upload photos, and fill in other arbitrary information in the form of text.
- Serve the mobile application with data.
We had already the most basic decisions taken. The project began.
(In this post, I will estimate mostly on the development part revolving around the Augmented reality features.)
Choosing the technology stack
Augmented Reality
The core concept of the application would be pattern recognition and video streaming part. Both the markers that would be recognized, and the videos that would play on top of them were not going to be bundled inside the application. It immediately became apparent that I needed a decent cloud-based image recognition library.
I examined many alternatives, but only one framework had reached stable status and provided all of these features: Vuforia. My client had already proposed this in advance, but I did my research prior to accepting it, because Vuforia’s solution is considered to be much more “barebones” than other ones offered at the time (like Meta.io, which was later acquired by Apple), because it required to go deep into OpenGL programming, or use an external rendering engine.
Backend
I chose NodeJS as my backend system, mainly because of its orientation around rapid prototyping. As a hosting provider, I had the choice of using a sandbox like Heroku, rent my own VPS. I chose the latter because I wanted a file management solution and the ability to scale without blowing our budget out of proportion. We rented a dual-core system w/ 2 GB RAM and an SSD for a start. As a hosting provider, we chose OVH because of the price-to-features ratio. Much has been said about OVH’s support, mostly bad. I hadn’t had any issues to date, and I was always able to set up a primary Linux server, so I figured it was the right choice.
I set up an Ubuntu 14.0.4 LTS system, and I decided to start my development on the following backend stack:
- NodeJS 0.10.x
- MongoDB 3.0.6
- AngularJS 1.3
I chose MongoDB w/ mongoose because I figured it would be easier to change my schema later on. Javascript shines when using MongoDB. Just for the sake of history, however, it was the last project I chose to use it. I dropped it in favor of PostgreSQL since for larger projects; I believe data integrity is always a priority when compared with ease-of-use.
Web Frontend
As a website, the frontend should be visible to my client only. Therefore I needed to create an administrative dashboard. I bought an Angular-based theme from https://wrapbootstrap.com/, but I ended up regretting it.
It was a great theme, with much attention paid to detail. But if I used the same frontend theme again, I would start with the HTML 5 template for the styling of the UI, and write everything else (like the animations) from scratch. I would advise anyone thinking about using themes from similar sources to do the same. Examples and scaffolding are the manifestations of just one approach that can be followed with the theme. There are many others — and you know better the architecture you need. You may end up throwing almost all of the original scaffolding made by the theme’s seller to the trash, keeping only the CSS and essential HTML parts.
Mobile App
Back in 2014, there weren’t many cross-platform choices available. Even if there were, I would still choose to go down the Native Development road over anything else, since I wanted to integrate Vuforia, which required linking to native C++ libraries and access to raw OpenGL interfaces.
For advertisements, we chose Mopub, because back then it was the only one providing a way of creating custom ads, and also allowed native ads (remember — 2014!).
Server configuration
At first, I chose JXCore as a runtime engine because of its simple multicore support. NodeJS uses a single thread and a single core by default, but I was using a dual-core machine, so I needed more granularity. JXCore didn’t help me, however, since I needed to start writing JXCore-specific code to handle things such as buffers. I didn’t have any problem doing so, but I was afraid to steer away from the standard programming practices and examples of plain NodeJS because it was a relatively new ecosystem and when NodeJS was forked, it was clear that I needed to be careful regarding my runtime engine choices.
I migrated to NodeJS and used PM2 as a process manager, and ran four instances of the backend API, to support many concurrent users.
My server was running on port 4000, and I should be able to serve static files like videos and photos. NodeJS was infamous for its bad performance when serving static files. Therefore, I decided to use Nginx when serving static files. I wrote a post about configuring it here:
I set up two upstream sources at Nginx, one acting as a proxy between port 80 and 4000 (for the backend API) and another one serving static resources (uploaded photos and videos from the file system).
Both are listening to port 443, and the one serving the files is also listening to 443, but it points to another path.
upstream node_server {
 server 127.0.0.1:4000;
}

upstream resources_server {
 server 127.0.0.1:9081;
}

server {
 root /home/<<user>>/v-content;
 listen 9081; server_name localhost;
location / {
 autoindex off;
 }
}

server {
 listen 443;
 client_max_body_size 500M;
 server_name <<server_name>>;
 ssl on;

 # Use certificate and key provided by Let's Encrypt:
 ssl_certificate /etc/letsencrypt/live/<<servicedomain>>/fullchain.pem;
 ssl_certificate_key /etc/letsencrypt/live/<<servicedomain>>/privkey.pem;
 ssl_session_timeout 5m;
 ssl_protocols TLSv1 TLSv1.1 TLSv1.2;
 ssl_ciphers 'EECDH+AESGCM:EDH+AESGCM:AES256+EECDH:AES256+EDH';
 ssl_session_cache shared:SSL:10m;

location / {
 proxy_set_header X-Real-IP $remote_addr;
 proxy_set_header X-Forwarded-For
 $proxy_add_x_forwarded_for;
 proxy_pass http://node_server;
 }

location /uploads/ {
 proxy_pass http://resources_server;
 }
}
When it was first created, I had used a paid service for obtaining an SSL certificate. Now, I am using Let’s Encrypt, which is free and works for my case (which is encrypting the requests with SSL).
Development
Augmented Reality — Render Video to Texture
Vuforia already provided many examples as tutorials, one of them showcasing how to play video on top of a recognized image. However, it was using some of Apple’s components, which didn’t allow downloading video data from a remote server.
Vuforia’s example would load a file from the file system instead of performing remote streaming. That was not an option for me. The videos that my client wanted to upload concerned entire stories around specific subjects and their duration spanned from one to twenty minutes. I couldn’t force the user to wait until the whole video was downloaded.
To prevent a bad user experience, I needed to:
- Get the coordinates and size of the recognized target from Vuforia.
- Create a texture spanning the marker’s location on the mobile app’s viewport.
- Stream the video in chunks, and then render the received bytes them onto this OpenGL texture in the user’s screen.
Many people were saying that the only way to do what I wanted was to use Unity (which was not an option for me). I was almost ready to give up, but eventually, I decided to steer away from Vuforia’s examples and start reading more about Vuforia’s and iOS OpenGL internals. I started rewriting Vuforia’s example from scratch.
The key was to separate the logic between the representation of the video data onto a texture, and the way the device acquires this video data and transforms it to OpenGL.
After some days, I developed the solution, and I wrote a post about it here for whoever is interested in solving similar problems:
One of the most challenging aspects of the application was done. I addressed an issue many people had, and the post is now stickied in Vuforia’s forums. That step was huge.
REST API and Administrator UI
I started by using MeanJS as my seed. It was using express and had support for Grunt tasks for building an uglified and packaged version of the frontend. It took me one month (part-time) to set up the prototype web service.
I believe the most challenging part was the file management, and how we were going to associate the videos uploaded with Vuforia. Vuforia doesn’t let you upload videos to the server. Instead, it only allows uploading the image to be recognized and a limited amount of metadata for the image. I decided to store JSON information to the metadata, linking this image with the ID of the video file ready to be played. Also, when uploading a marker to Vuforia, you will have to wait approximately twenty minutes until the image is available to be used (until then, it will be in “processing” state, unable to be altered, used or deleted).
A description of the steps followed to serve this purpose is the following for the backend server:
- I developed a specific frontend section where videos would be uploaded at will, and associated with a name.
- In the “markers” section, I offer the option of uploading an image file to Vuforia, and associating it with:
- The id of the video to be played
- A description of the video
- Add the opportunity for the video to be played on-camera or full screen
- When the user uploaded a marker, I would store this image to the local store, and then create a polling function, and would add it to a pool of polling functions. Those functions would query Vuforia directly about images that are not currently finished processing. In the meantime, the frontend would not be allowed to make any changes to the target.
- When a polling function returns that an image had completed successfully, it would be removed from the pool. If not, then before removing it, I would remove all associated pictures and files with it.
And on the Mobile Application side:
- Present the camera to the user
- When a target gets recognized, its metadata (previously uploaded to Vuforia) would indicate the ID of the video ready to be played. With this ID, I would request the server to get the full path of the video.
- I would use Apple’s AVPlayerItem to download OpenGL data to the device’s RenderBuffer, and then render the video content to where Vuforia’s recognition library indicated through their SDK.
If you noticed, I mentioned that when downloading the metadata from the recognized marker, I would still need to perform a REST request to the server to get the file’s location. I opted for making this “round trip” instead of hardcoding the file path to the metadata. The reason for this is because I wanted granularity in my local data. Since Vuforia wasn’t handling anything other than uploading a marker, data syncing between Vuforia and my server was a pain. I needed the opportunity to change the location of the file without contacting Vuforia again.
I developed the application for iOS in Objective C++. I also could use Unity, but I am happy I didn’t. The app is now very lightweight, and the remote video streaming worked flawlessly.
It took me 2 months to have my prototype ready. During these two months, I used:
- Crashlytics (now Fabric.io) for distributing betas to my client
- AFNetworking for performing network requests
- PromiseKit.
Continuous Integration / Deployment
Deploying to the server was a time-consuming process for me, so I wanted to streamline my deployment process a bit more, to save time for development. For a long time now, I am using TeamCity for my CI and CD needs.
There are much cheaper solutions out there. But I really cannot get away from Jetbrain’s attention to quality and stability. TeamCity has been proven an invaluable tool and didn’t give me any nasty surprises.
#!/bin/bash
DEPLOY_FOLDER=/opt/<<path_to_folder>>
TEMP_FOLDER=/opt/<<path_to_folder>>-temp
WEB_APP_FOLDER=webapp
DEPLOY_FOLDER_APP=${DEPLOY_FOLDER}/${WEB_APP_FOLDER}

if [ -d "${TEMP_FOLDER}" ]; then
echo "Removing existing folder..."
rm -rf ${TEMP_FOLDER}
fi

mkdir ${TEMP_FOLDER}

rsync -a ./${WEB_APP_FOLDER}/ ${TEMP_FOLDER}
echo "Finished copying files"
cd "${TEMP_FOLDER}"
echo "installing with npm install..."
npm install

echo "now building executable..."
#preparing to stop all other processes

if [ -d "${DEPLOY_FOLDER}" ]; then
echo "Removing existing folder..."
cd ${DEPLOY_FOLDER_APP}
pm2 stop "status-e"
rm -rf ${DEPLOY_FOLDER}
fi

mv ${TEMP_FOLDER} ${DEPLOY_FOLDER}
echo "moved ${TEMP_FOLDER} to ${DEPLOY_FOLDER}"
cd ${DEPLOY_FOLDER}
ls -afl ${DEPLOY_FOLDER}
npm run build

pm2 stop pm2run.json
pm2 start pm2run.json
pm2run is a PM2 process file, configuring pm2 to run this process in cluster mode, with four instances.
This way, each time I committed something in Git, in the ‘deployment’ branch, TeamCity would immediately deploy the new web app with all my changes. This is a very simplified method of restarting the server and can result in a downtime of 1–10 seconds during each deployment. I now have an Nginx load balancer in front, and I am deploying the service progressively in two instances, redirecting the Nginx to the active one each time, until the other one has finished the deployment.
Writing down the API
In addition to the Augmented Reality Feature, the app also has many more (panic buttons, location awareness, seeing associated nearby partners on the map, and loyalty features).
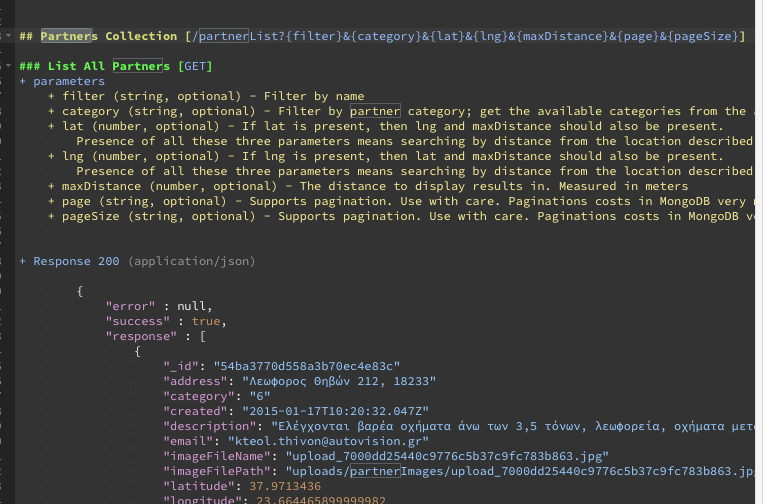
Because of these features, the mobile REST API grew up to be larger than I thought it would be.
The web application would serve an Android and an iOS Application. The Android app was going to be created by another fellow developer, not myself. Therefore I also needed to communicate the API specifications to another person.
I used Apiary.io for this purpose.
I don’t know if you have the habit of documenting your API’s when you write them. If you don’t, then you should. And when you do, you should use Apiary. Back in 2014, it supported only the Markdown format for documenting the APIs, but they later added support for Swagger.
Having an API specification saved me hundreds of hours of communicating the specifications to the other guy developing the Android version of the app.
APIs are the universal language of the internet — you ought to provide one to your collaborators. Avoid leaving any part of how your API works to the imagination of the person consuming your API.
Release mode
After much testing, the initial prototype was released to the App Store.
Years have passed since then. I still remember it as a project that gave me much joy, thanks to its multidisciplinary requirements regarding development.