Xcode And Boost Liraries: A setup tutorial (article)
Some days ago, I had an idea, which needed a regular exrpession library. I found Boost, but I couldn’t install it properly. As much of a programmer I am, I couldn’t figure out to install boost, since installing needs knowledge of CLE, C++ and using Command Line Programs like Make and CMake. After many tries and questions in forums, I managed to install Boost in OS X, and configure it to work with Xcode.
INSTALLATION PROCEDURE
So, you need to obtain the library first.You will need to go to the Boost site and download the .tar.gz file that contains the Boost library. The documentation says a million things about installation, and how some libraries need to be compiled separately, but you won’t need to do those stuff. Just follow the instructions in here.
First, extract the boost_xxx_.tar.gz on any directory. When the folder that contains Boost is created, open terminal. You will need to configure the installation procedure first, then install the program into a directory. This tutorial will explain how to install Boost in the default directory, using the default options.
In order to install boost, type in the terminal “cd path/to/boost/directory” (without the quotes). Then, type “./configure”. The configuration script will need a minute or two to complete the process and configure the installation. When it finishes, type “sudo make install”. You will be asked for your password. Give it, and the installation procedure will begin. It will take a few minutes. Actually, it will take longer than a few. If all goes well, you will get a success message from the terminal at the end.
A LITTLE EXPLANATION ON WHAT WE DID
Although it doesn’t seem like so, the Boost libraries use a modified version of Make in order to build and run. This modified version is called “jam” and the Unix executable is located into the same folder you have the Boost distribution. You will not need to directly use that. The configurescript which you ran earlier will create a Makefile that Jam or Make will use to install the Boost distribution into your machine.
When compiling, all headers you see in the folder are actually converted into dynamic libraries, and will then be put into the appropriate place in order to be able to load from any compiler (command line or IDE). By default, Boost creates the Boost headers into “/usr/local/include/boost_xxversionxx/boost/” and the actual libraries (the dylibs) into “usr/local/lib”. You can alter these locations, but I strongly recommend not to do so, unless you know what you’re doing
SETTING UP XCODE TO USE BOOST
 Now, you need to figure outa way to load the boost libraries from Xcode. Normally, you just need to include the Libraries. However, in most cases this will not work, and you will need to specifically tell Xcode that there are some Boost libraries and that it needs to find them into the hard disk.
You will again need the help of Make. Don’t worry,you won’t mess around with the command line.
–Open Xcode. Create a new project.
–From the list of templates that appears, choose “emptyproject”. This will create an empty project without any targets executables whatsoever.
–Make a new file named “main.cpp” into the project. Do not create the “main.h” header. This will create the standard main.cpp file needed for C++ applications.
–Make a new file in the project named “Makefile” (without any extension) and paste this text in it. This will tell Xcode to build the current selected build target using the Make tool. First, the Makefile will be processed. Afterwards, the main.cpp (or any other source you may add) will be compiled, and the resulting application will be created.
#makefile for the boost project
#You must modify the environment variables at the start of the file
#in order to work!
#example: Consider the 1_34_1 boost distribution, which installs all the
#stuff by default in usr/local/lib (for the libraries) and in
#usr/local/boost_1_34_1/boost (for the headers to be included).
# The following setup is for loading the libraries from this location.
#If you want to load them from a custom location, modify the variables
#below accordingly.

BOOST_ROOT=/usr/local
PRODUCT_NAME=example
BOOST_INCLUDE_DIR=$(BOOST_ROOT)/include/boost_1_34_1
BOOST_LIB_DIR=$(BOOST_ROOT)/lib
   main: main.cpp
       g++ main.cpp -I$(BOOST_INCLUDE_DIR) -L$(BOOST_LIB_DIR) -o $(PRODUCT_NAME)
clean:
       rm -f main
This will tell the compiler to look for the boost distribution. Note that if your boostdistribution is not iin the default location, you will need to modify that file.
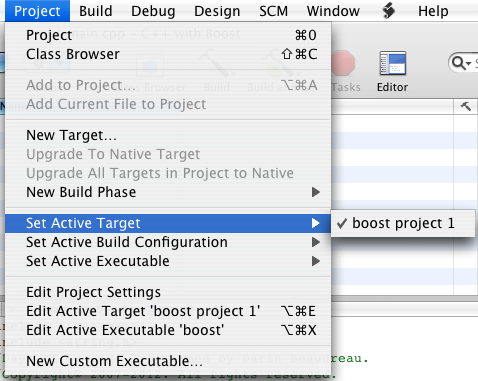
–Finally, you will need to make an executable. Under “Executables”, right click->add->New Custom Executable. Set the desired custom executable, choose yourexecutable path, and add it to your current project. If anything goes well, you can now compile and run command line applications using XCode and the Boost Library!
It would be very useful for anyone trying to install boost in OS X to read the documentation about Make. Many programs and independent open-source developers use it to distribute their programs for various platforms. I strongly recomment reading the documentation before reading this guide, since it will provide you with much information about why did we include this Makefile into our project, and how you can optimize this file to achieve better performance for compiling Boost libraries.
If all went well, you can build and run the following program
#include <iostream>
#include <boost/any.hpp>
#include <boost/regex.hpp>

// Small usage of the regex library
boost::regex e("(\d{3,4})[- ]?(\d{4})[- ]?(\d{4})[- ]?(\d{4})");
int main (int argc, char * const argv[]) {
    const char* message = "Hello World";
    boost::any greeting(message);
    std::cout << boost::any_cast<const char*>(greeting) << std::endl;
    return 0;
}
DOWNLOAD AND INSTALL AN XCODE TEMPLATE
After installation, if you want to skip the setup procedure, you can download this template, extract its contents, and put the resulting folder into /Library/Application Support/Apple/Developer Tools/Project Templates/Command Line Utility .
After that, you will be able to choose XCode With Boost template from the “New Project” dialog. Note that you may need to alter the contents of the makefile to match your own boost installation folders.
USEFUL LINKS:
The Boost Libraries Project
Apple Developer Connection
The Make, CMake and Boost Build Programs